Welcome Winter Season!

Look for our Delicious Winter recipes

Wednesday, December 17, 2014

BBQing in SE Texas

SE Texas is recognized by its fabulous BBQ. Reckon in Texas refers to beef not pork. One of the primary ingredients is the brisket.

Brisket is a cut of meat from the breast or lower chest of beef. The brisket muscles support about 60% of the body weight of standing/moving cattle. This requires a significant amount of connective tissue, so the resulting meat must be cooked correctly to tenderize the connective tissue. Otherwise you will end up with very hard meat, not what you want.

After almost 10 yrs, in SW TX (and multiple tries barbecuing briskets), we have finally reached a recipe and technique that is worth trying.

Trimmed Beef Brisket
We start off with a nice and trimmed whole beef brisket. We recommend not to remove the fat in between the layers, as the same will provide moist during the smoking process.

Quality ingredients and spices will be require to make both the wet rub and the dry rub. If you can grind whole toasted spices would be even better, as this technique will improve fragrance and flavor to be infused by the spices.


We like to use black pepper, garlic, smoked paprika and cayenne pepper for the dry rub.

For the wet rub we chili peppers, yellow mustard and beef concentrate are a good combination. 


Rub the brisket with the wet run ensuring you are covering all sides and rubbing in between the layers of beef.

Sprinkle the brisket with the dry rub on all sides. Press the rub down with your hands to ensure it remains on the meat.

Cover and refrigerate the brisket for up to 2 hrs turning once after the first hour.

Remove the brisket from the refrigerator and let it sit at room temperature for about and hour. 


Place the brisket in the smoker and hot smoke until internal temperature reaches 160 F. This could take anywhere from 4 to 8 hours depending on how cold was the brisket at the time it was placed in the smoker, the average temperatures of your smoker, and the outside temperature.


Remove the brisket from the smoker, place it in an aluminum pan. Pour one bottle of your favorite beer and one cup of apple juice, and cover with two layers of aluminum foil. Return to the smoker and continue to cook until the internal temperatures reaches 195 F. This can take up to another 4 to 6 hours.

Remove the brisket from the smoker and let is sit cover for 30 minutes.


Grilled the brisket for about 30 min, turning one, and serve. 


Friday, November 8, 2013

There is no such thing as a lean sausage - we don't make dry grainy tasteless links

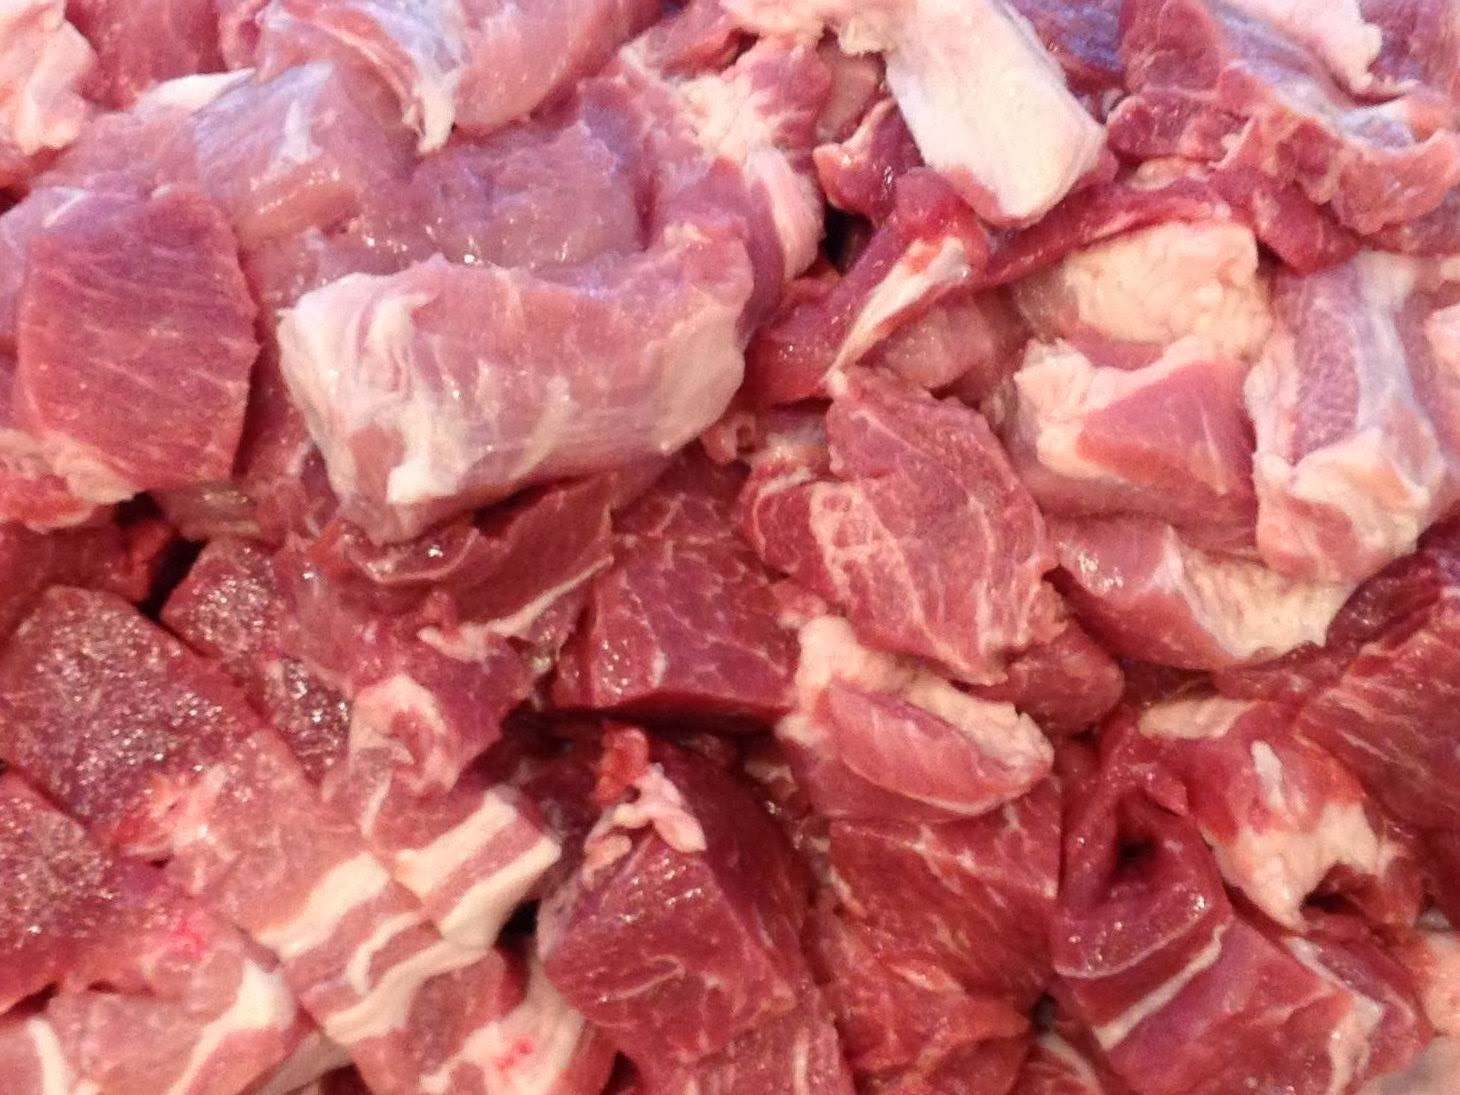
Well marbled pork shoulder
Diced back fat
Sausages are at their best when you have the opportunity to make them yourself. With home made sausages you can control the quality of the meats used, and specially the amount of fat you add. But yes, you will need to add fat to ensure your sausages are juicy and pumped when grilled. Home made sausages do have a lower fat ratio than commercial links, but they still need fat. You can accomplish this by either using well marbled meats or by adding back fat. This should not be of concern, since the amounts to be used are still very low when compared to commercial sausages. I would not recommend to remove the fat from your sausages, as this will make the dry, grainy and just yukky.
Spices
Smoked sausage cut to reveals spices

High quality spices will go a long way to give your sausages a rainbow of flavor, not to forget that they will look great when you cut them, and you can see them perfectly arranged inside the meat. Mustard and coriander seeds are perfect, they stay whole when mixed and look great on your links.

meat & spices
Well mixed ingredients


Add the spices to your meats prior grinding, and if possible let them marinate overnight prior grinding. Thorough mixture of your spices with your meats and back fat is critical to ensure even taste for all your links. If you plan to smoke your sausages adding a binder, such as soy powder, helps ensure the links will retain their moisture when grilled. Small portions of liquid are essential, and any liquid will do from water to rum.


Stuffing machine
Stuffing the tripe
The use of the right equipment is essential. From the grinder and the mixer to the stuffing machine, you want to make sure you are using the right tools when making home made sausages. Keeping the stuffing machine and your meats very cold throughout the process will make the grinding and stuffing processes easier, and will maintain the integrity of the food. A little water on the receiving tray will go a long way to help the tripe slide.
Hot smoked links

Sausages in the smoker
Stuff all your tripe first, then you can make the links by either twisting them, or tying them with cords. The length is up to you. We prefer animal tripe (fresh or dry) to synthetic casings. 


Whether you are making fresh sausages or you will smoke them, home made sausages are the best you can have. Smoking sausages gives them  a very nice color, not to mention the added flavor. Apple & cherry wood are the best for these links, and remember to spray them with apple juice every now and then while in the smoker.


When your links are ready give the a quick bath in icy water, this will stop the cooking process and ensure your links are not overcooked.

Enjoy!


Wednesday, March 27, 2013

Taking on Crawfish


Cannot live in SE TX, next door to Louisiana, and not venture with crawfish. We experimented with  two typical dishes which main ingredient is crawfish: Cajun boil and Etouffee. Both were delicious and quite simple to make. We are sharing our experience with the Cajun Boil.


This is an outdoor activity, for both cooking and eating. You will need a big pot, large enough to hold all the ingredients, a high BTU burner to ensure you can properly boil the water, and a lot of news paper to cover the surface you plan to use for eating. This is a "hands-on" meal and its is very messy but all worth it.

We boiled about 13 pounds of crawfish (about half a sac), enough to satisfy our cravings and use the rest for the Etouffee. 13 pounds of boiled crawfish will feed 8-10 people, depending on their hunger.


We recommend using fresh live crawfish and the best veggies you can get.
For spices we used Old Bay and Louisiana brands. You can also use Zatarain.


It is important to boil the potatoes almost to a done state, as the crawfish will be done only in 5-7 min. How much you boil the ears will depend on how soft you like your corn. We placed ours when the potatoes were half done. Total boiling time for the potatoes and corn was about 20-22 min.


Because you need to perform these tasks prior using the crawfish, it is very important that you keep your little critters nice and cool. We kept them in an ice box with ice.


Lastly, we added the crawfish and cooked them for about 7 min counted from the time the water boiled again. As they cook you can see them turn to a nice and bright red. You get to eat the corn ears and potatoes, which are great sides to accompany this dish.


Once cooked we scooped them out with the ears and potatoes, leaving the rest of the items in the pot. The liquid should be discarted.

We served them in separate plates with lemon wedges...Enjoy!

You can add fresh shrimp, heads on, to the mix and make this a Seafood Boil too.

Sunday, January 27, 2013

Duck liver pâté Au Cognac
Have you ever made Duck liver pâté? We have not, only made chicken liver terrines.
I personally love liver pâtés and have had in my sight to try to make both duck and goose pâté. Looked at various pâté recipes, including terrines and mousses, but none of them were appealing. I am not a fan of baking the dish, much less grounding the raw livers.
Decided to modify my chicken liver terrine and it was a success. The delicate flavor of the liver combined with black truffles and Madeira was perfect. Use mascarpone for consistency and finish with a splash of cognac! This is one going to the recipe book. Next try to make goose pâté. Needed to try with a less costly ingredient, you have to have some experience before you experiment with a 65$/lb dish :D

Friday, December 28, 2012

Smoking Game - Pheasants & Quails

Birds brined
We had the incredible opportunity to smoke game hunted by our neighbors. Pheasant & quail that was, both fresh from the hunting grounds.

Lay out to form pellicle
We started by brining the birds for 24 hrs, and drying in the refrigerator for another 24 hrs.

Birds were smoked with Alder chips, 1.5 hrs for the Quails and about 3 hrs for the Pheasants, using the lowest temperature range for hot smoking. It is critical for the wet pan to have plenty of liquid to ensure bird don't dry out while smoking.


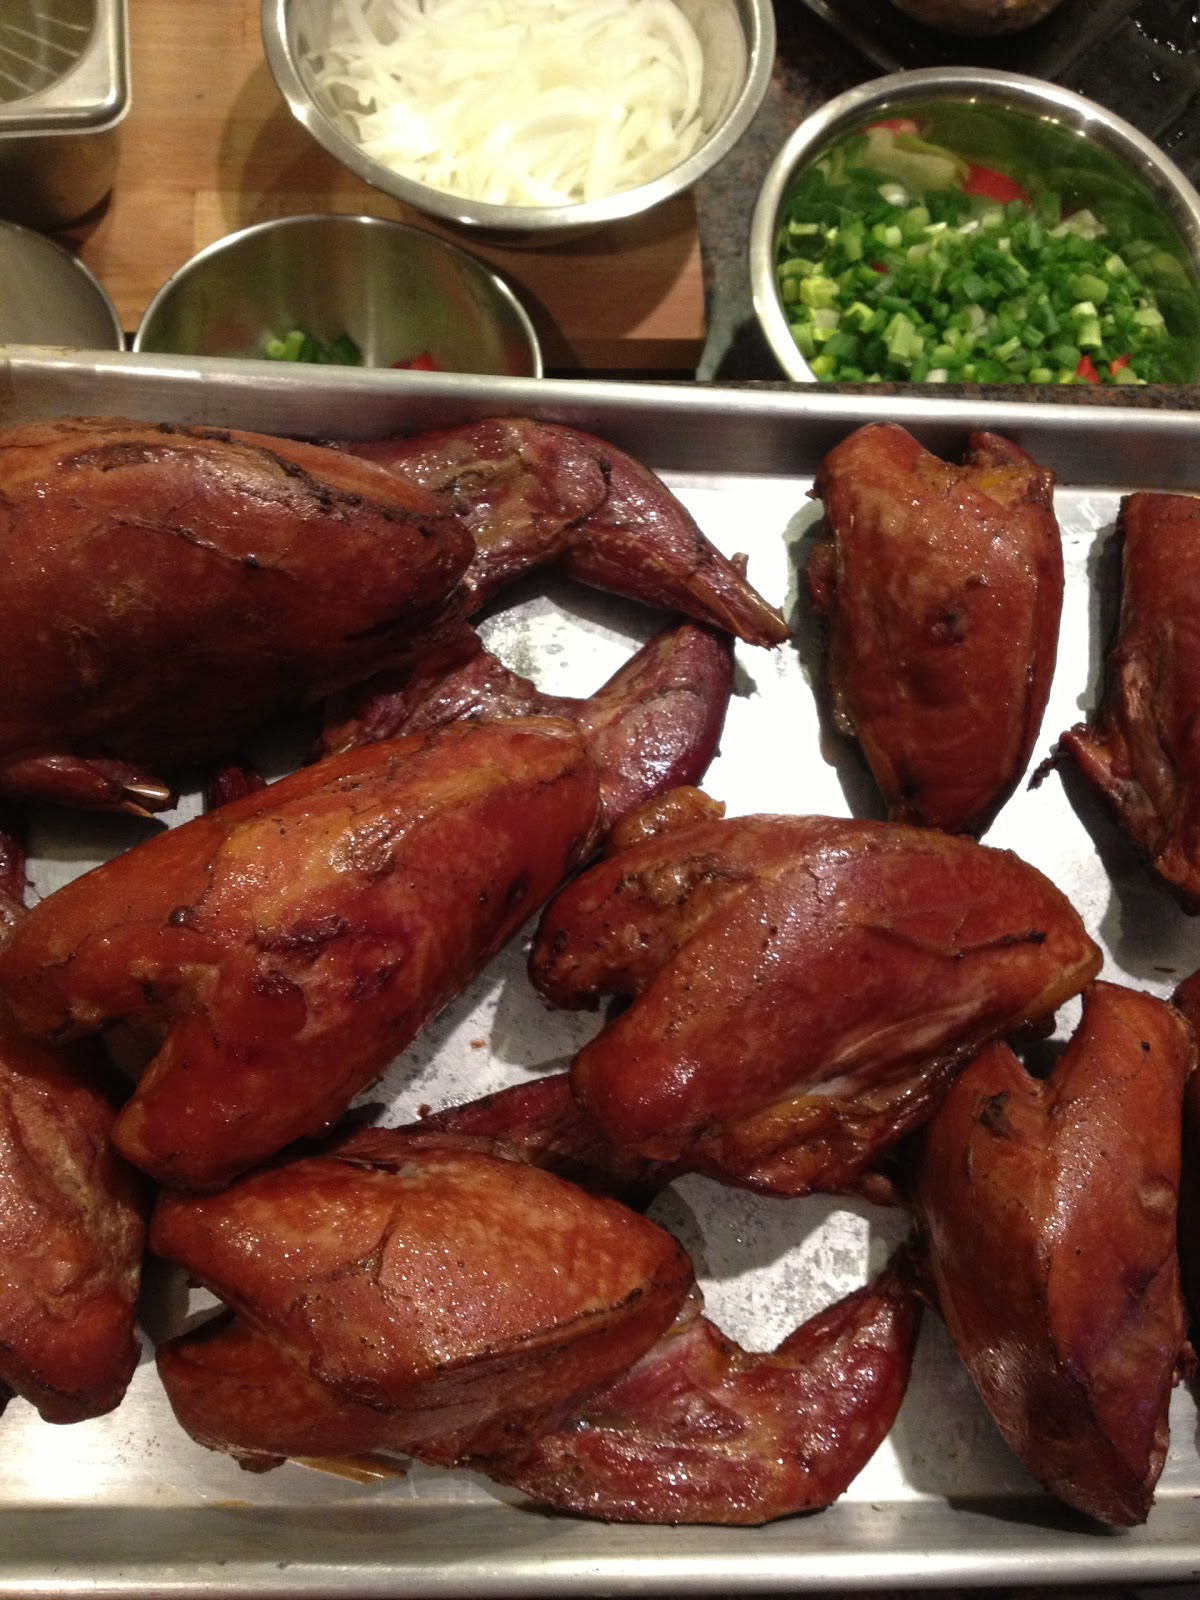
Birds smoked
Smoked Pheasants
The results were perfect. Meat was juicy and tasty, without overshadowing the sweet taste of the birds.  

We enjoyed them as appetizers served over toast pieces of breed, spread with peppered goat cheese, and topped with four berries preserve. An excellent combination to enjoy the delicate flavors of the smoked birds, and the perfect or' derv to celebrate Xmas Day in the great company of family and dear friends.

Saturday, September 29, 2012

Blood Sausages / Morcillas


Fully cooked & read to eat
There are home-country items not available in the US. You can find some acceptable substitutes but at the end of the day they are not really that good to bother. Either you learn to live without them or --like we did-- you learn to make them! Blood sausages are on the list of many items we learned to make and enjoy abroad // Hay muchos platos Venezolanos que no se consiguen en EEUU. En ciudades grandes puedes encontrar substitutos acceptables pero en realidad no son tan buenos. Por lo tanto, aprendes a vivir sin tus platos favoritos (y de vez en cuando acceptas substitutos), o haacs como nosotros aprendes a prepararlos y disfrutartlos cuando quieras.

Fall season is here and with it comes time to make boold sausages // Llego el otoño, la mejor epoca  para preparar morcilas

Wednesday, February 22, 2012

Really really Good Cook Books

Have you ever tried to cook a great dish? You followed the recipe to the letter, and the end results were terrible? The aspect of your dish looked nothing like the picture? Not to mention whatever you created was not edible? I sure have, the problem is not that you cannot follow a recipe, but that not all chefs are willing to share their secrets in their books, and "forget" to share sequence of actions, and even some steps that happened to be critical for the success of the dish. Unfortunately, unless you start learning some way, you cannot master cooking to be able to cook w/o a recipe; hence the need to start with cook books and recipes.

Lucky for you there are some really really good Cook books out there that truly help you get to the end result, and have a dish that looks like the one on the picture. Below is a list of excellent cook books proven to given you what is on their picture and obtain meals that are tasty as they look!

Serious Barbecue by Adam Perry Lang - For the outdoors aficionados
Mexico - Beautiful Cookbook – Excellent Mexican food made from scratch
Charcuterie by Michael Ruhlma & Brian Polcyn – For the more adventurous cooks that are ready to take their cooking skills to the next level
Bread from ciabatta to rye by Linda Collister – If you like bread and don’t mind the time it takes to make and bake good bread, this is the best bread book out there
The River Cottage Meat Book by Hugh Fearnley-Whittingstall – This guy is great! You will love this one

For any cook aficionado, there is nothing more frustrating than investing in ingredients, time and effort to have to throw your dish to the garbage. Many “simple” recipes shown in none cooking magazines, are very likely to be a waste of your time. If you are into mag subscription Saveur is one of the best ones out there.

If you like to watch cooking shows, anything with Alton Brown in it will be worth your while, especially if you are new to cooking; and as Alton would put it, anything you cook from his show or his books will be "Good Eats". Please stay away from Emeril, he never shows you the whole process, and the dishes he portraits in the show are not what he was cooking on TV.

I invite you to try some of these recommendations and have fun while you cook!

Friday, February 17, 2012

Baked vs. Just Refrigerated - How do you like your Cheese Cake?

There are basically two types of cheese cake. The ones you just pour and refrigerate, and the ones you bake; I am not referring to the crust, which is always baked. I am referring to the cheese base. I am a "baked" cheese cake fan, and have been one for as long as I can remember.

I learned to make baked cheese cakes from scratch since I was 13 years old, because New York style baked cheese cake was not available in my home town (only the refrigerated type), and I could only get the good stuff during vacation time while in the US.

Cheese cakes are tricky, messed up the order in which you mix the ingredients, bake at the wrong temperature, or under cook, and you will end up with a big mess. Also, toppings are critical, you cannot just put anything on top of a cheese case, you need the correct mix of flavors that will enhance the creamy cheese flavor, not overshadow it.

Recently I tried a new recipe, a hybrid approach, still baked but temperature ranges and bake time significantly different than the one I typically follow. To my surprise the cheese cake was outstanding! Only a few touches I would add to this recipe, based on my 30+ years of experience baking cheese cake. This recipe uses goat cheese, which is as you know, is very strong in taste. Hence, not all toppings would be appropriate. I have not tried any one topping yet, as I was a little incredulous about the recipe and decided only to try the plain recipe to fully appreciate the flavor without any other components added. Now that this is a recipe that can be repeated, will try a few exotic toppings and find the perfect match for this silk texture phenomenon.

Sunday, January 22, 2012

Getting ready for some serious smoking

Pastrami and smoked fish are one of our favorite cold cuts to entertain. Thanks to the mild winter we have had to date here in SE TX, the weather is perfect for cold smoking fish.

The grouper is curing in salt while the briskets were just pulled out of the brine and drying in the refrigerator to form the necessary pelicle required for smoking.

We should be ready  to smoke these pieces tomorrow and Tuesday.

Saturday, January 7, 2012

Fin de Año con clase // Year End with class !!

Tuvimos el placer  de cerrar en año en compañia de nuestros seres queridos. Desde mediados de Septiembre, y hasta mediados de Enere, recibimos la visita de casi toda la familia. Con tan buenos comenzales no nos quedo otra que cocinar! // We had the priviledge and pleasure of wrapping up 2011 in company of our loved ones. Since mid September, and thru mid January, we welcome most of our family. With such good "eaters" we had no other choice but to cook for them!

Cocinando desde pavo y pernil hasta piernas de cordero; tuvimos la oportunidad de mejorar recetas conocidas y probar nuevas recetas. Durante 2012 les compartiremos nuestro aprendizajes y nuevos tips. Despues de todo, la practica hace la perfeccion. // From Turkey and Hams to whole legs of Lamb, we master known recipes and venture into new ones. In 2012 we will share our learning and news tips. As you know, practice drives perfection.

Sunday, January 2, 2011

Joy’s Apple pie (World Famous)

A pesar de que algunos de la familia insisten en pedir la receta del pie de limón (como si no se las hubiese dado ya 30 veces), voy a ignorar la petición y colocar aquí el que considero ser mi mejor pie, aprobado por comensales en tres países diferentes.

Para la masa (flaky pastry):
Se corta en cuadritos pequeños ½ taza de mantequilla sin sal y ½ taza de manteca vegetal y se colocan en el freezer. Se mide 1/3 taza + 2 Cdas. de agua y también se coloca en el freezer por ~15 min o hasta que la mantequilla está bien firme y el agua bien helada, sin congelar.

En un bowl metálico grande o en el envase de un procesador se miden 2 ¼ tazas de harina de trigo (sin leudante), 3 Cdas. De azúcar y 1 cdta. de sal y se mezcla bien. Se agrega la grasa bien fría y se “corta” en la mezcla de harina con dos cuchillos, o con un estribo, o en el procesador hasta que los grumos más grandes sean del tamaño de una lenteja. Debe trabajarse rápido para que la grasa no se derrita, la idea es que la harina cubra los pequeños fragmentos de mantequilla de manera que cuando se agregue el agua no ocurra la formación de gluten.

Al llegar este punto se agrega el agua fría rociando la mezcla de harina a medida que se mezcla con un tenedor o con pulsos del procesador, apenas se debe agregar agua suficiente para formar una masa. Se termina de unir la masa haciendo presión con el puño cerrado, con cuidado para no trasmitirle mucho calor a la masa. Debe tener aspecto heterogéneo, con pelotas de grasa visibles a través de la harina. Rápidamente se divide la masa en dos partes, a cada una se le da la forma de un disco de unos 15 cm de diámetro y se envuelve en envoplast. La masa debe reposar en la nevera por lo menos 6 horas (o 2 h en el freezer) o hasta 1 semana en la nevera o hasta 6 meses en el freezer.

Para el relleno:
Como las manzanas pierden mucho líquido y volumen al cocinarse, el mejor relleno de apple pie es pre-cocido. Con el relleno pre-cocido se logra un pie con relleno completo entre la masa de la base y de la cobertura, permitiendo inclusive que le haga un diseño en “lattice” a la cobertura. Para el relleno pre-cocido pelar, remover las semillas y cortar en lonjas de ~ 1 cm de ancho 1,5 Kg de manzanas Gala, Fuji o Golden Delicious (7-8 manzanas). Estas variedades de manzana mantienen su integridad al cocinarse. Rociar las lonjas con jugo de limón para que no se oxiden. En una olla grande se derriten 6 Cdas. de matequilla sin sal y se agregan las lonjas de manzana, revolviendo para cubrirlas con la mantequilla. Se cocinan tapadas a fuego medio y revolviendo ocasionalmente hasta que estén suaves en el exterior pero todavía crocantes en el interior. Al llegar a este punto se agrega ¾ de taza de azúcar y 1 Cda. de canela (no hace falta ninguna otra especie). Se cocinan las manzanas destapadas a fuego alto hasta que se forma un almíbar y mezcla esté burbujeando. Se retira del fuego y se agrega una cucharada colmada de harina y se revuelve bien. Se transfieren para una bandeja y se enfrían totalmente.

Montar el pie:

Pre-calentar el horno a 400 F. Se extiende uno de los discos de masa con el rodillo, en movimientos del centro hacia afuera hasta obtener un disco de unos 35 cm de diámetro. Se dobla la masa dos veces (formando un ¼ de disco) para transferirla a un molde de 10 pulgadas. La masa se desdobla y se presiona sobre el molde. Se transfiere el relleno ya frio y se nivela bien. Se cortan 2 Cdas. de mantequilla en lonjas finas y se distribuyen sobre el relleno. Se extiende el otro disco de masa, se transfiere doblada y se acomoda sobre el relleno para formar la cobertura. Con una brochita, se mojan levemente los bordes de las dos masas para unirlos apretando con los dedos. Se corta el exceso de masa y se adorna el borde bien sellado. Se hacen cuatro cortes en la masa de la cobertura para que salga el vapor. Se pueden hacer adornos con la masa que sobró sobre la cobertura.

Para cocinar el pie, se cubren los bordes con tiras de papel de aluminio y se coloca el pie en la parte baja del horno pre-calentado. Sugiero colocar el pie sobre una bandeja cubierta con papel de aluminio para evitar ensuciar el horno. El pie se cocina por 60-80 minutos, cubiertos los bordes durante los primeros 40 minutos. El pie estará listo cuando esté bien dorado y los jugos estén burbujeando a través de los cortes. Después de retirar del horno, se debe enfriar totalmente sobre una rejilla. Para servir se puede calentar el pie por 20 minutos a 350 F y claro que hay que servirlo “a la mode” con una bola de helado de vainilla!

Wednesday, December 22, 2010

Pernil de Raiza

Uno de los mejores perniles que he disfrutado es el de mi suegra Raiza de Arab y ella ha compartido la receta con nosotros para que podamos saborearlo también aquí en Brasil. Desde 2004 hemos repetido varias veces la receta con excelentes resultados. Aquí la pongo para que todos la disfruten.

Ingredientes

Un pernil fresco descongelado
Limón
Ajo machacado
Orégano
Salsa inglesa
5-6 ajíes dulces o 1 pimentón
1 cebolla grande
1 1/2 taza de jugo de naranja
1 taza vinagre
Sal y pimienta recién molida al gusto
Papelón rallado o azúcar morena
1 cda. de harina o maizena

Preparación
Se lava el pernil con limón y luego se seca con papel absorbente.
Adobar el pernil con el ajo, orégano y salsa inglesa. Batir en la licuadora 1 taza del jugo de naranja, el vinagre, la cebolla y el aji dulce o pimentón. Se coloca el pernil adobado en una bandeja honda y se baña con la mitad de la mezcla, la otra mitad se guarda. Se cubre bien el pernil con papel de aluminio heavy duty y se deja reposar toda la noche en a nevera (~16 h), volteándolo una vez (a las 8 h). Al día siguiente, se precalienta el horno a 350 y se le agrega sal y pimienta al gusto a la mezcla de jugo de naranja que sobró. Con esa mezcla se adoba nuevamente el pernil, si la bandeja no es suficientemente honda la mezcla se puede ir colocando poco a poco durante la cocción. La cocción demora aproximadamente 1 h para cada kilo de peso. El pernil se cubre bien con papel de aluminio y se mete al horno. Cuando haya pasado la mitad del tiempo de cocción se le quita el papel de aluminio y se verifica que al puyarlo cerca del hueso no le salga sangre. Si todavía tiene sangre se baña con su jugo, se cubre, se regresa al horno y se chequea cada media hora. Cuando ya no le salga sangre al puyarlo, se baja la temperatura a 300 F, se baña con su jugo y se regresa al horno, sin cubrir, por 30 min. Después, se voltea el pernil y se recoje parte del jugo que ha soltado, suficiente para hacer una salsa, y se coloca en el congelador para desgrasarla. Si tienes termómetro de carnes, se puede introducir el termómetro en este momento para acompañar la cocción. El pernil se baña con su jugo y se espolvorea con papelón o azúcar morena y vuelve al horno. Cada media hora se baña con su jugo hasta que la parte interna alcance la temperatura ideal (74-76 F) y que al puyarlo en su parte más gorda no le salga líquido turbio si no apenas un poco de líquido transparente. Si no se ve dorado, se puede espolvorear nuevamente con papelón y azúcar morena y dorar rápidamente con el grill del horno. Una vez listo se tapa bien con papel de aluminio y se deja reposar por lo menos 30 minutos antes de cortarlo. Para hacer la salsa se coloca el jugo desgrasado en una olla de fondo pesado y se lleva a hervor. Se le ajusta la sazón con sal, pimienta y salsa inglesa. Se disuelve el harina o la maizena en 1/2 taza de jugo de naranja y se le agrega a la salsa para espesarla, revolviendo siempre. El pernil se corta en lonjas finas y s sirve acompanhado de su salsa.
Feliz navidad!

Sunday, December 19, 2010

Torta de Navidad / Xmas Cake

Desde que salimos de Venezuela, adoptamos una nueva tradición familiar para compartir buenos deseos a toda nuestra familia desde donde quiera que estuvieramos. Lo hacemos a través de esta receta la cual hemos modificado y adaptado durante los últimos 10 años. Aprovechamos la oportunidad de compatir esta deliciosa Torta de Navidad para que mis hermanas también la puedan hacer donde quiera que se encuentren. El último paso es muy importante, ya que es el ingrediente secreto que tiene nuestra torta. Les deseamos muchas felicidades en estas fechas y esperamos que reciban nuestros buenos deseos mienstras disfrutan de esta torta.

Ingredientes:
1 taza de Ron Venezolano dorado
1 taza de Marzala
1 taza de pasas negras
1 taza de pasas doradas
1/2 taza de blueberries secos
1/2 taza de cerezas secas
1/2 taza de cranberries (arandonos) secos
1/2 taza de datiles cortados en pedacitos
1/2 taza de higos secos cortados en pedacitos
1/2 taza de duraznos secos cortados en pedacitos
Si no tienes algudos de estos ingredientes puede aumentar las cantidades de lo que tengas hasta totalizar 5 tazas de frutas secas y/o cambiar por frutilla, concha de naranja, ciruelas
1/2 taza de jengibre seco caramelizado cortado en pedacitos
Ralladura de una naranja
Ralladura de un limón (el verde)
1 taza de azucar blanca
1+1/4 barra de mantequilla sin sal (5 oz)
1 taza de cidra de manzana (puedes cambiar por néctar de manzana o jugo de manzana)
8 clavos esteros molidos (1/2 cucharadita de clavo molido)
6 guayabitas enteras molidas (1/2 cucharadita de guayabita molida)
1 cucharadita de canela molida
1 cucharadita de jengibre molido
1+3/4 tazas de harina
1+1/2 cucharadita de sal
1 cucharadita bicarbonato de soda
1 cucharadita de polvo para hornear
2 huevos
1/2 taza de nueces tostadas picaditas (nueces, pecanas, almendras)
Brandy para rocear

Instrucciones:
Combinar todas las frutas secas con el ron y la marzala, y dejar re-hidratar durante toda la noche y hasta por 2 semanas (si tienes el tiempo). Si no tienes el tiempo, puedes colocar la mezcla en el microhondas y calentar por 5 minutos el alto.
Colocar la mezcla de frutas y alcohol en una olla grande que no reaccione con el alcohol y colocar sobre la hornilla/llama. Agregar la mantequilla, azucar, jugo/cidra de manzana y todas las especies molidas.
Llevar a un hervor revolviendo constantemente, reducir la llama/temperatura y cocinar por 5-10 minutos hasta que la mezcla se vea espeza.
Retirar de la llama y dejar enfriar por lo menos 30 minutos (y hasta por 2 dias en la nevera).
Pre-calentar el horno a 3250 F
Combinar los ingredientes secos y cernirlos sobre la mezcla de frutas y rápidamente combina todo con una cuchara/paleta de madera.
Agregar los huevos, uno a uno, mezclando completamente después de cada huevo
Agregar las nueces y mezclar sólo para incorporar
El ingrediente secreto:
Todos los  mienbros de la familiar deben tomar la paleta con una mano y juntos mezclar por un minuto mientras le desean cosas buenas a todos aquellos que comeran de esta torta.

Llenar el model perparado con mantequilla y harina y hornear por 50-60 minutos. Revisar que la torta esté lista incertando un palillo de madera en el centro y que el mismo salga limpio. Agregar tiempos de 5 minutos cada uno hasta que el palillo salga limpio.
Retirar del hormo y colocar sobre un rajilla y dejar enviar en el molde.
Rociar con Brandy miestras aún está caliente.
Cuando la torta esté totalmente fria colocar en un recipiente con tapa donde se pueda matener. Rociar con Brandy cada 2 dias hasta que se acabe :)

Esta torta es más sabrasa cuando tiene por lo menos1 semana macerandose.

Si vaz a regalar esta torta recuerda mencionar que son muy dichozos ya que esta torta esta llena de buenos deseos.

Tuesday, September 21, 2010

Smoking smoking smoking

Nothing brings out the taste of meat and spices than smoking. Pork, beef, poultry, and fish will always taste better if smoked before eating.

We enjoy the taste of smoke, as long as it is a compliment to the flavors of the meat, while you can still taste the spices added. High quality ingredients -- for the meat to the spices -- will make all the difference.

Pecan is our preferred wood to smoke pork, beef, and poultry. If you want to intensify the smoke taste, you can mix chunks of hickory or mesquite with the pecan. This way you can control how much smoke is added to the meat. Using mesquite only, especially with poultry, can be too strong for some, and totally overtake the flavors. Wood from fruit trees is best to smoke fish. Apple & cherry are good options.

Fresh spices are very important. You may not know, but spices  do expire, and if they have been sitting in your cupboard for over six months, you may want to get new and fresher ones before smoking.  Pre-toasting seeds and whole spices brings out their entire flavor before grinding to add for dry rubs, or when for use whole in brines.

To ensure smoke adheres to the meat while in the smoker, make sure you have left it in the refrigerator for at least six hrs (12-24 hrs works best) for the pellicle to form.  Pellicle is the sticky surface that forms over the meat while drying in the refrigerator that the smoke will adhere to. No pellicle no smoke flavor added to your meat.

Sunday, July 4, 2010

Mero Ahumado / Smoked Grouper

Uno de los pasapalos más sabrosos en fiestas en el Este de Caracas era el famoso "Mero Ahumado". La delicadeza del mero, la textura simplemente perfecta, servido sobre un bueno pan negro con un toque de salsa, sólo lo sufiente para integrar todos los sabores en un solo mordizco...
One of the most expected appetizers served in parties in East Caracas was the smoked grouper. The subtle taste of the smoked fish, combined with its delicate texture, presented over a pieces of pumpernickel with a hint of sauce, just enough to integrate all the flavors in your mouth in just one bite...

Tenemos más de 4 años tratando de lograr esa misma receta, y creemos que lo hemos logrado. Vecinos y familiares que han tenido la dicha de probar nuestros intentos, y nosotros mismos que recordamos bien ese sabor tan especial y único, pensamos que podemos colocar esta receta en nuetra lista de éxistos, 4 años después del primer experimento!
Over the last 4 years we have been trying to re-create this recipe, and we believe we finally made it. We have shared our latest product with neighbors and family members, and based on our experience of that taste we so fondly remember, we believe this recipe deserves a place in our successes in cooking, 4 year later after our first try!

Como dirían en mi tierra "ver para creer". Si estas fotos no demuestran el éxito de nuestros intentos después de 4 años no sabemos que lo hará.
People say a picture is worth a thousand words. Well, look for yourselves, if these pictures do not show how far we have come after 4 years of trying, nothing else will.


De ahí el dicho "Del mar el Mero y de la tierra el Cordero"
To support the saying from the sea the grouper and from the earth the lamb.